Gomo Sim Registration Online Link [Quick Guide & Steps]
Gomo SIM Registration is a mandatory process for all Filipinos because it secures their data from illegal activities. This step is essential to protect yourself from threats like fraud and identity theft. If you have already a GOMO SIM, it’s important to register. If you do not register your SIM, your SIM could be deactivated and you will not be able to use services like calls, texts, and data.
If you are new users of GOMO make sure to register your SIM as soon as possible. This process is simple and easy you can do it online successfully. In the Philippines, the purpose of Act No. 11934 is to provide security and prevent crime. After registering GOMO SIM you can access data safely. Three methods were used for registration.
SMS
Web portal
GOMO APP
What is GoMo SIM?
GoMo stands for “Go Mobile,” representing a modern approach to mobile service that prioritizes convenience and user control. Unlike traditional mobile plans, GoMo is designed to give users more freedom in how they manage their data, calls, and texts.
Registration Requirements
To successfully register your DITO SIM, you’ll need to provide the following:
- Valid SMART Number
- Full Name
- Nationality
- Date of Birth
- Complete Residential Address
- Valid government-issued ID card,
- Selfie
Sim Registration for Company Requirements
If you want to register under a company or a business you should have the following information:
- Full name of the representative
- List of Mobile numbers required
- Company name
- Official registered company address
- Registration number of the company
- Business registration proof:
- Partnership
- Corporation
- Cooperatives
- Foundations
- Associations
- BIR Form 2024
- Government Agencies
- LGUs
- SUCs
- Foreign
- Missions
- Foreign entities Operation in the Philippines and Embassies
SIM Registration for Foreigner
If you are a foreigner and want to register DITO SIM follow these steps:
- Full name
- Nationality
- DOB
- Address in the Philippines
- Passport
- Visa
- Entry permit
- Selfie
- Duration of stay
- Return Ticket
DITO Registration ID list
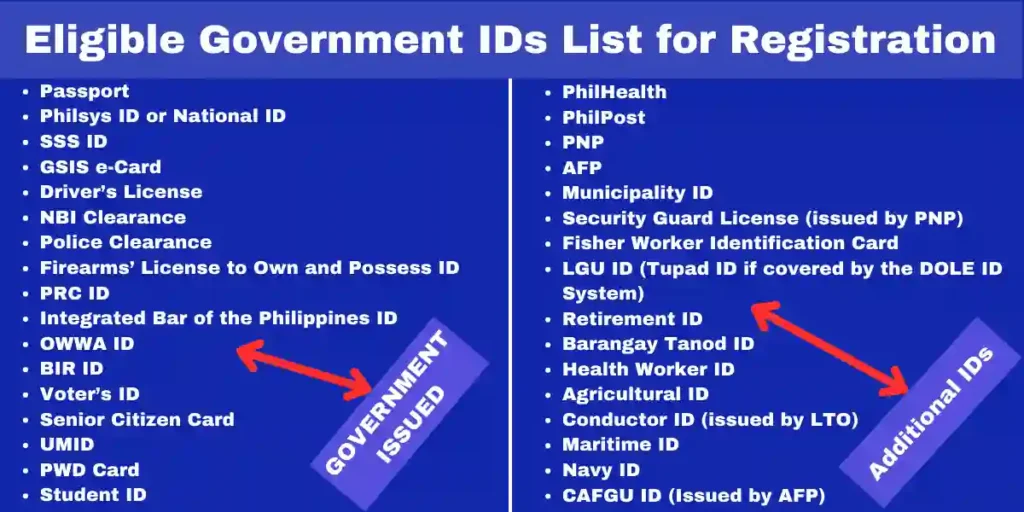
To register a DITO Card, you need to provide a valid ID card to register a sim online.
Here’s a table that categorizes the provided IDs into Primary and Secondary categories:
| Category | ID |
|---|---|
| Primary IDs | 1. Passport |
| 2. Philippine Identification (PhilID) | |
| 3. Driver’s License | |
| 4. Social Security System (SSS) ID | |
| 5. Government Service Insurance System (GSIS) eCard | |
| 6. Unified Multi-Purpose ID (UMID) | |
| 7. Professional Regulation Commission (PRC) ID | |
| 8. Voter’s ID | |
| 9. Senior Citizen ID | |
| 10. Overseas Workers Welfare Administration (OWWA) ID | |
| 11. Bureau of Internal Revenue (BIR) ID | |
| 12. Philippine Postal ID | |
| 13. School ID (for students) | |
| 14. Alien Certificate of Registration (ACR) | |
| 15. Company ID | |
| Secondary IDs | 1. Barangay Certification |
| 2. National Bureau of Investigation (NBI) Clearance | |
| 3. Police Clearance | |
| 4. Birth Certificate | |
| 5. Marriage Certificate | |
| 6. Seaman’s Book | |
| 7. Integrated Bar of the Philippines (IBP) ID | |
| 8. PhilHealth ID | |
| 9. Firearm License | |
| 10. Land Transportation Office (LTO) Temporary Driver’s License |
GOMO SIM Registration Online in 2024
GOMO SIM registration process is similar to globe sim registration. Firstly you need to visit the web portal and register sim online. Enter your valid details which are commonly
Registration Via GOMO App
Step1: Go to the Play Store on your Android mobile phone Download the GOMO app

Step2: Install the app on your mobile phone

Step3: After installing the app follow these steps
Step4: Signup for a New Account
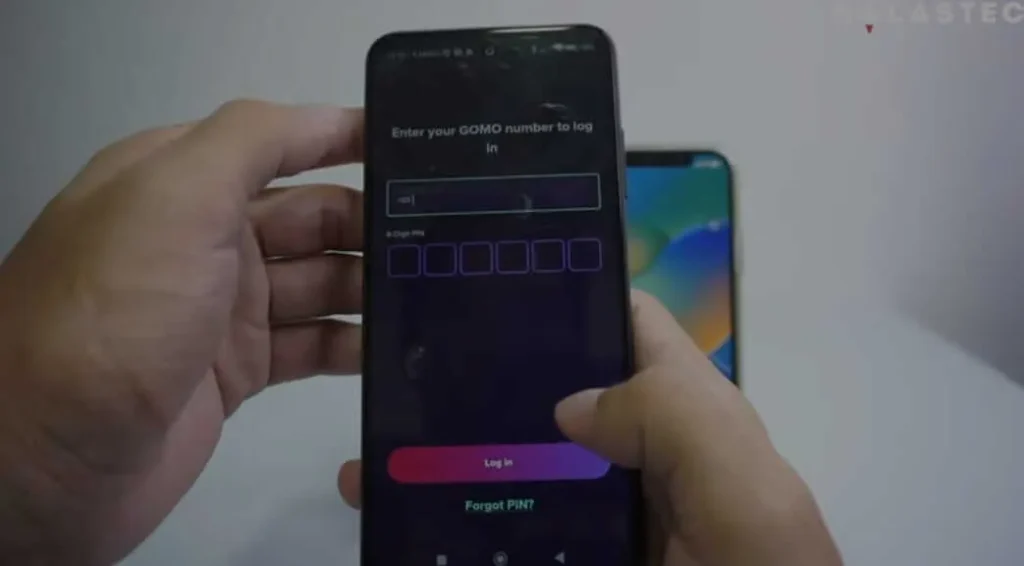
Step5: Login with the user ID and password which you have created
Step6: Provide the personal information and fill up the form
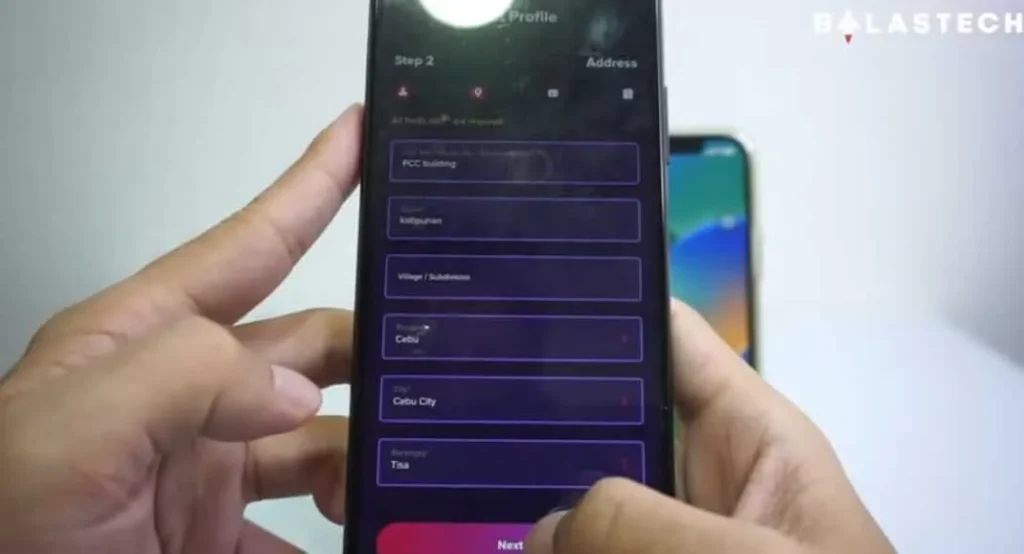
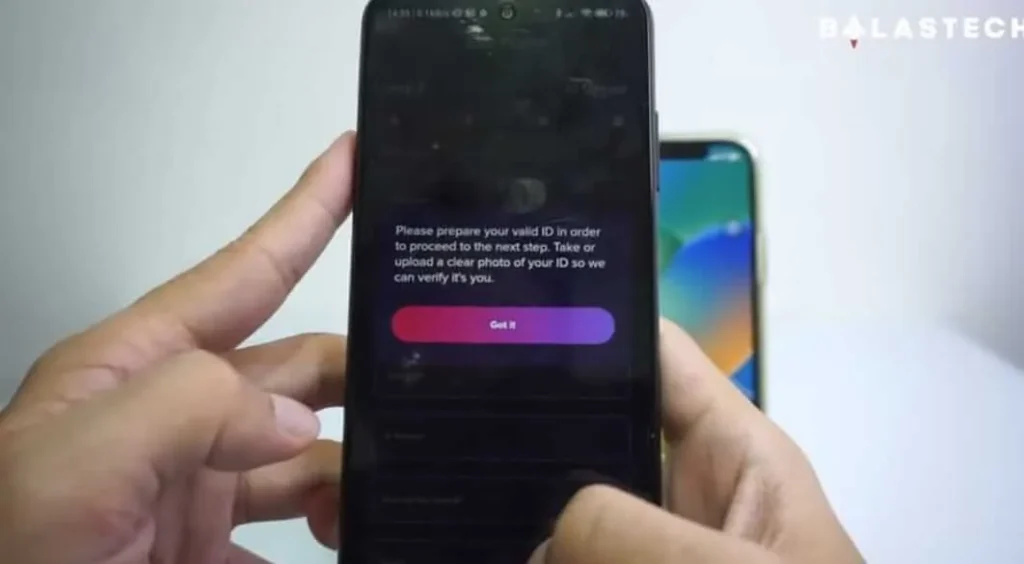
Step7: Enter all information and upload a valid ID card along selfie photo
Step8: Again check the information you have provided, if you find any mistake edit it and modify

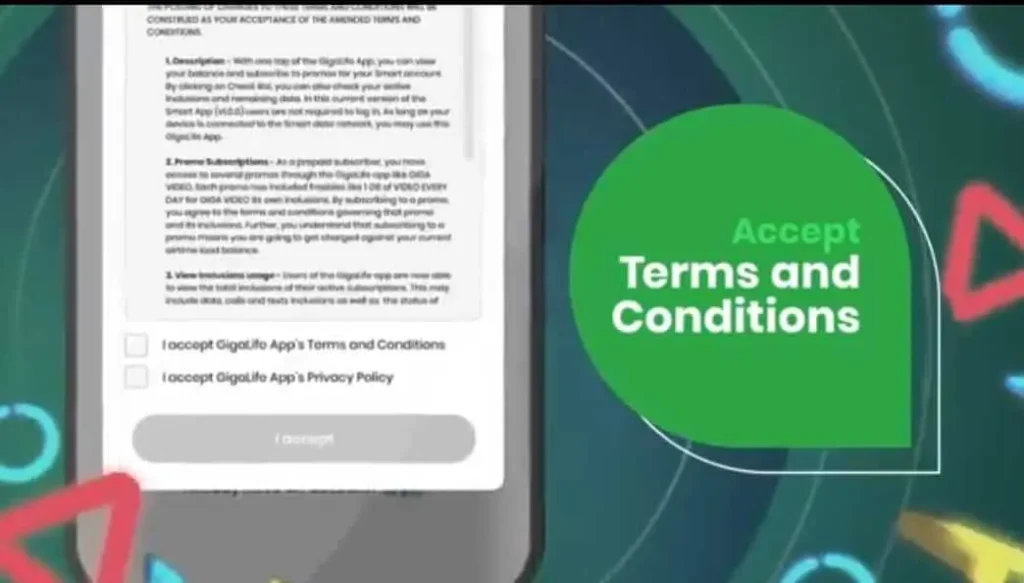
Step9: Click on Terms and Conditions
Step10: Click on Submit Button
Step11: After submitting your form, Gomo will check your application
Step12: You will get a confirmation code via SMS or Email
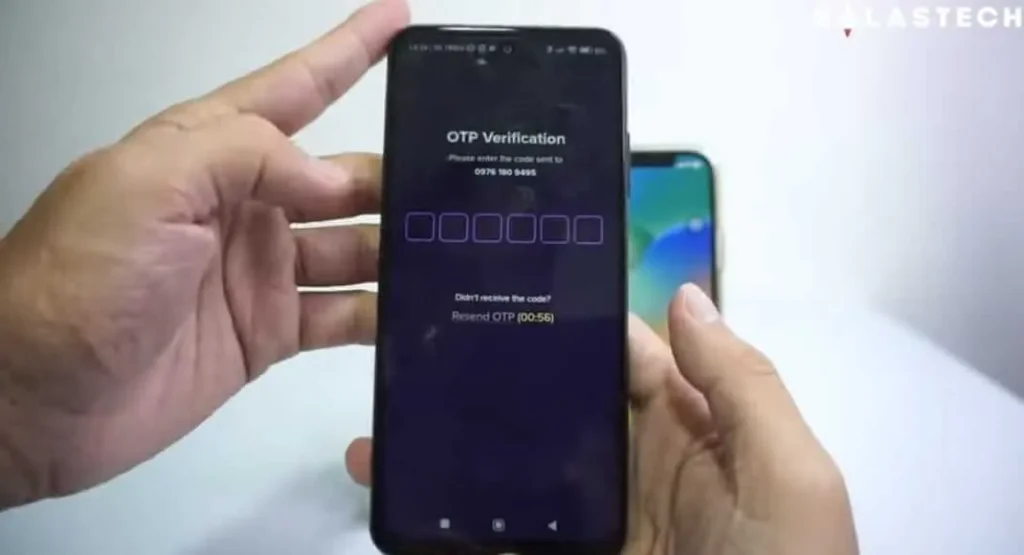
Step13: Enter the verification code in the GOMO App to complete the registration process
Register Via SMS
Insert the SIM: Place your SIM card into your mobile phone.
- Power On Your Phone: Turn on your device.
- Connect to the Network: Wait for your phone to connect to the network.
- Wait for Activation SMS: It might take a few minutes to receive an activation message.
- Restart Your Phone: Restart your phone to finalize the activation.
- Verify Services: Check that your data and other services are working properly.
- Go to: [https://www.gomo.ph/](https://www.gomo.ph/)
- Have a valid ID ready: Passport, SSS ID, GSIS e-Card, Voter’s ID, Postal ID, UMID, or TIN ID
- Fill out the form: Enter your name, birthdate, address, gender, mobile number, and email
- Upload a clear photo of your ID
- Verify your details: Check and confirm your information
- Click “Submit” to complete registration
- Look for confirmation: A message will confirm your SIM is registered
Activate Your SIM Card
- Insert the SIM: Place your SIM card into your mobile phone.
- Power On Your Phone: Turn on your device.
- Connect to the Network: Wait for your phone to connect to the network.
- Wait for Activation SMS: It might take a few minutes to receive an activation message.
- Restart Your Phone: Restart your phone to finalize the activation.
- Verify Services: Check that your data and other services are working properly.
IF GOMO SIM Registered (Check Here)
To verify your GoMo SIM registration, you can use one of these simple methods:
By Dialing a Code:
1. Open your phone’s dialer.
2. Enter *101# and press call.
3. Wait a few minutes for a confirmation message to appear on your screen.
By Sending a Text (SMS):
1. Open your messaging app and start a new message.
2. Type “Register” and send it to 26888.
3. Wait for a confirmation text to verify your registration.
Some Errors During Registration
During SIM card registration, you might encounter various problems. Here’s how to address some common issues:
SIM Card Not Detected:
Check Installation: Make sure the SIM card is properly inserted into your device. Double-check that it’s seated correctly in the SIM slot.
Compatibility Check: Ensure that your SIM card is compatible with your phone model. Sometimes, older phones may not support newer SIM cards.
Unable to Download the GoMo App:
Verify Internet Connection: Ensure you have a stable internet connection. If your connection is weak, the download might fail.
Try the App Store: Open the Play Store or App Store on your device and search for the GoMo app. Ensure that you’re downloading the latest version.
Use VPN if Needed: If you’re experiencing issues due to regional restrictions, try using a VPN to download the app.
If I fail to register my GOMO SIM?
Review Your Details: Double-check the information you entered during registration, including your email address, full name, and phone number. Ensure there are no typos or missing information.
Follow Instructions: Make sure you’ve completed all required steps in the registration process and submitted all necessary documents.
By addressing these issues, you can ensure a smoother registration experience with your GoMo SIM card.
Why Register Your GoMo SIM?
Registering your GoMo SIM is essential for several reasons. Registering your GoMo SIM is crucial for activating your mobile services properly and safeguarding against fraud.
How to Contact GoMo Support for Assistance?
If you encounter any issues or need help with your GoMo SIM registration, contacting GoMo support is straightforward. You can reach them through several channels:
Customer Service Number: Call GoMo’s dedicated support hotline for immediate assistance.
Email Support: Send an email detailing your issue to GoMo’s customer support address.
Online Chat: Use the live chat feature on the GoMo website or app for real-time help.
Social Media: Reach out to GoMo’s official social media accounts for support and updates.
How Much Can I Buy a GoMo SIM For?
GoMo offers three different SIM options, each tailored to various needs:
₱699 – Unlimited Data SIM for 30 Days
Product Overview
- Enjoy unlimited data at speeds of up to 5 Mbps for a full 30 days.
- This package also includes a free SIM card.
Details:
- Monitor your data, calls, and SMS usage through the GoMo app.
- Convert your data into vouchers or experiences using ’Mo Creds.
- No need for additional bills or reloads.
- Benefit from nationwide LTE coverage and 5G readiness
₱399 – 30GB No Expiry Data SIM
Product Overview
Get 30GB of data that never expires, along with a free SIM card.
Details:
- Track your usage of data, calls, and SMS with the GoMo app.
- Use ’Mo Creds to convert your data into various rewards and experiences.
- Enjoy a free welcome gift when you activate and register.
- No bills or reloads are necessary.
- Includes nationwide LTE coverage and is 5G-ready.
₱399 – Easy Switch SIM with 30GB No Expiry Data
Product Overview
Switch your existing number to GoMo and get 30GB of data that never expires, plus a free SIM card.
Details
- Manage your data, SMS, and calls using the GoMo app.
- Convert data into rewards with ’Mo Creds.
- Receive a free welcome gift upon activation and registration.
- No additional bills or reloads are needed.
- Provides nationwide LTE coverage and is 5G-ready.
Delivery Information
- Metro Manila: Typically delivered within 1 to 2 days.
- Provincial Areas: Usually delivered within 3 to 7 days.
- If you encounter any issues with activation or need assistance, contact GoMo customer service for support.
Choosing the Right Plan
When you want to buy the mobile plan you have two options prepaid and postpaid option, and all users must know about the details of these bundles. Each plan has its benefits, here I will guide you on which plan is best for you.
Prepaid Plans
This plan offers you different amounts of usage, such as talk time, text message, and call bundles.
Key Benefits
- Predictable Spending: Paying in advance helps you avoid unexpected charges and keeps your monthly costs under control.
- No Credit Checks: Since payment is made upfront, there’s no need for a credit check, making it accessible to those with various credit backgrounds.
- Flexibility: Prepaid plans generally do not involve long-term contracts, providing the freedom to switch providers or change plans without incurring penalties.
Potential Drawbacks
- Limited Features: Prepaid options might not offer the same range of benefits as postpaid plans, such as premium customer service or discounts on devices.
- Service Restrictions: Some prepaid plans may have service limitations or reduced priority in customer support compared to postpaid plans.
Postpaid Plans
Post-paid plan offers different types of monthly basis services. This option is well-suited for those who prefer predictable billing and are comfortable with a contractual commitment.
Key Benefits
- Stable Monthly Billing: You receive a consolidated monthly bill, which can simplify budget management if your usage is consistent.
- Additional Perks: Postpaid plans often come with benefits such as larger data allowances, subsidized device options, and enhanced customer support.
- Contractual Benefits: Long-term contracts may include advantages like discounts on new devices and exclusive promotions.
Potential Drawbacks
- Contractual Commitments: Postpaid plans usually involve a contract, which may result in early termination fees if you decide to cancel before the end of the term.
- Potential for Extra Charges: Exceeding your plan’s limits could lead to additional charges, which might affect your monthly expenses.
Making Your Decision
To choose the right mobile plan, consider your typical usage patterns, budget constraints, and the importance of flexibility versus additional features. By weighing these factors, you can select a plan that aligns with your personal needs and financial situation.
Keep Your Existing Number with GoMo
Switching to GoMo while keeping your current phone number is a smooth process if you follow these steps:
Start with Your USC: First, confirm that you can transfer your number to GoMo. Contact your current network provider and request your Unique Subscriber Code (USC). This code is essential for the porting process.
Complete the Application: Fill out the necessary details in your number-switching application. Make sure to provide a valid email address where you’ll receive updates on the status of your application.
Order Your GoMo SIM: Once your application is approved, you can order your GoMo Easy Switch SIM. Use the GoMo PH App or visit the GoMo website to complete your purchase.
Activate Your SIM: Install the GoMo PH App on your device. After receiving your GoMo Easy Switch SIM, use the app to set it up and create your GoMo account. Follow the on-screen instructions to activate your SIM.
Complete the Switching Procedure: Open the GoMo PH App and go to the “Account” section. Select “Switch to GoMo” and then click “Check Switching Status.” Follow the prompts to start the port-in process.
Enter Your Porting Code: You will receive a porting code via email. Enter this code in the app to confirm the transfer.
Confirmation Message: Wait for a confirmation message indicating that your number porting was successful.
Log In and Register: Once your number has been successfully ported, log into the GoMo PH App with your new number and complete the remaining registration steps.
By following these steps, you’ll be able to switch to GoMo without losing your existing number, ensuring a seamless transition.
Conclusion
In conclusion, 3 methods for SIM Card registration are discussed by following these you can register your SIM easily. 1. Visit the website portal and register your SIM, 2. Via GlobeOne App 3. Via SMS. If you face any problem during registration, discuss the issue in the comment box.